Documentation Index
Fetch the complete documentation index at: https://wb-21fd5541-weave-caching.mintlify.app/llms.txt
Use this file to discover all available pages before exploring further.
プロンプトの作成、評価、改善は、AI エンジニアにとって核心となる活動です。
プロンプトへのわずかな変更が、アプリケーションの振る舞いに大きな影響を与えることがあります。
W&B Weave を使用すると、プロンプトの作成、保存、取得、そして時間の経過に伴う進化の管理が可能になります。
Weave は、プロンプトの構成方法について特定の制約を設けません。シンプルなニーズであれば、組み込みの weave.StringPrompt クラスや weave.MessagesPrompt クラスを使用できます。より複雑なニーズがある場合は、これらのクラスやベースクラスである weave.Prompt を継承し、format メソッドをオーバーライドしてカスタマイズできます。
これらのオブジェクトを weave.publish で公開すると、Weave Projects の Prompts ページ に表示されます。
StringPrompt
StringPrompt は、システムメッセージ、ユーザーのクエリ、または LLM へのスタンドアロンなテキスト入力に使用される単一の文字列プロンプトをログに記録します。複数メッセージの会話のような複雑さを必要としない個別のプロンプト文字列を管理する場合には、StringPrompt の使用をお勧めします。
import weave
weave.init('intro-example')

system_prompt = weave.StringPrompt("You speak like a pirate")
weave.publish(system_prompt, name="pirate_prompt")

from openai import OpenAI
client = OpenAI()

response = client.chat.completions.create(
  model="gpt-4o",
  messages=[
    {
      "role": "system",
      "content": system_prompt.format()
    },
    {
      "role": "user",
      "content": "Explain general relativity in one paragraph."
    }
  ],
)
import * as weave from 'weave';
import OpenAI from 'openai';

async function main() {
  // weave.init はクライアントインスタンスを返します
  const weaveClient = await weave.init('wandb/prompt-examples');

  const systemPrompt = new weave.StringPrompt({
    content: 'You speak like a pirate',
    name: 'your-prompt',
    description: 'A helpful description of your prompt',
  });

  // init から返されたクライアントを使用します
  await weaveClient.publish(systemPrompt, 'pirate_prompt');

  // Weave でコールを追跡するために OpenAI クライアントをラップします
  const client = weave.wrapOpenAI(new OpenAI());

  const response = await client.chat.completions.create({
    model: "gpt-4o",
    messages: [
      {
        role: "system",
        content: systemPrompt.content
      },
      {
        role: "user",
        content: "Explain general relativity in one paragraph."
      }
    ],
  });
}

main();
MessagesPrompt
MessagesPrompt を使用すると、マルチターンの会話やチャットベースのプロンプトをログに記録できます。これは、完全な会話フローを表すメッセージオブジェクト(“system”、“user”、“assistant” などのロールを持つ)の配列を保存します。複数のメッセージにわたってコンテキストを維持したり、特定の会話パターンを定義したり、再利用可能な会話テンプレートを作成したりする必要があるチャットベースの LLM にはこの使用をお勧めします。
import weave
weave.init('intro-example')

prompt = weave.MessagesPrompt([
    {
        "role": "system",
        "content": "You are a stegosaurus, but don't be too obvious about it."
    },
    {
        "role": "user",
        "content": "What's good to eat around here?"
    }
])
weave.publish(prompt, name="dino_prompt")

from openai import OpenAI
client = OpenAI()

response = client.chat.completions.create(
  model="gpt-4o",
  messages=prompt.format(),
)
import * as weave from 'weave';
import OpenAI from 'openai';

async function main() {
  // weave.init はクライアントインスタンスを返します
  const weaveClient = await weave.init('wandb/prompt-examples');

  const prompt = new weave.MessagesPrompt({
    messages: [
      {
        "role": "system",
        "content": "You are a stegosaurus, but don't be too obvious about it."
      },
      {
        "role": "user",
        "content": "What's good to eat around here?"
      }
    ],
  });

  // init から返されたクライアントを使用します
  await weaveClient.publish(prompt, 'dino_prompt');

  // Weave でコールを追跡するために OpenAI クライアントをラップします
  const client = weave.wrapOpenAI(new OpenAI());

  const response = await client.chat.completions.create({
    model: "gpt-4o",
    messages: prompt.messages,
  });
}

main();
プロンプトのパラメータ化
StringPrompt と MessagesPrompt はどちらも、パラメータ化を通じて動的なコンテンツをサポートしています。これにより、実行時に異なる値で埋めることができるプレースホルダー({variable} 構文を使用)を備えた、柔軟で再利用可能なプロンプトテンプレートを作成できます。これは、一貫した構造を維持しながら、入力、ユーザーデータ、またはコンテキストに応じてプロンプトを適応させる必要がある、スケーラブルなアプリケーションを構築する際に役立ちます。format() メソッドは、これらのプレースホルダーを実際の値に置き換えるためのキーと値のペアを受け取ります。
import weave
weave.init('intro-example')

prompt = weave.StringPrompt("Solve the equation {equation}")
weave.publish(prompt, name="calculator_prompt")

from openai import OpenAI
client = OpenAI()

response = client.chat.completions.create(
  model="gpt-4o",
  messages=[
    {
      "role": "user",
      "content": prompt.format(equation="1 + 1 = ?")
    }
  ],
)
import * as weave from 'weave';
import OpenAI from 'openai';

async function main() {
  // weave.init はクライアントインスタンスを返します
  const weaveClient = await weave.init('wandb/prompt-examples');

  const prompt = new weave.StringPrompt({
    content: 'Solve the equation {equation}',
  });

  // init から返されたクライアントを使用します
  await weaveClient.publish(prompt, 'calculator_prompt');

  // Weave でコールを追跡するために OpenAI クライアントをラップします
  const client = weave.wrapOpenAI(new OpenAI());

  const response = await client.chat.completions.create({
    model: "gpt-4o",
    messages: [
      {
        role: "user",
        content: prompt.format({ equation: "1 + 1 = ?" })
      }
    ],
  });
}

main();
MessagesPrompt でも同様に動作します。
import weave
weave.init('intro-example')

prompt = weave.MessagesPrompt([
{
    "role": "system",
    "content": "You will be provided with a description of a scene and your task is to provide a single word that best describes an associated emotion."
},
{
    "role": "user",
    "content": "{scene}"
}
])
weave.publish(prompt, name="emotion_prompt")

from openai import OpenAI
client = OpenAI()

response = client.chat.completions.create(
  model="gpt-4o",
  messages=prompt.format(scene="A dog is lying on a dock next to a fisherman."),
)
import * as weave from 'weave';
import OpenAI from 'openai';

async function main() {
  // weave.init はクライアントインスタンスを返します
  const weaveClient = await weave.init('wandb/prompt-examples');

  const prompt = new weave.MessagesPrompt({
    messages: [
      {
        "role": "system",
        "content": "You will be provided with a description of a scene and your task is to provide a single word that best describes an associated emotion."
      },
      {
        "role": "user",
        "content": "{scene}"
      }
    ]
  });

  // init から返されたクライアントを使用します
  await weaveClient.publish(prompt, 'emotion_prompt');

  // Weave でコールを追跡するために OpenAI クライアントをラップします
  const client = weave.wrapOpenAI(new OpenAI());

  const response = await client.chat.completions.create({
    model: "gpt-4o",
    messages: prompt.format({ scene: "A dog is lying on a dock next to a fisherman." }),
  });
}

main();
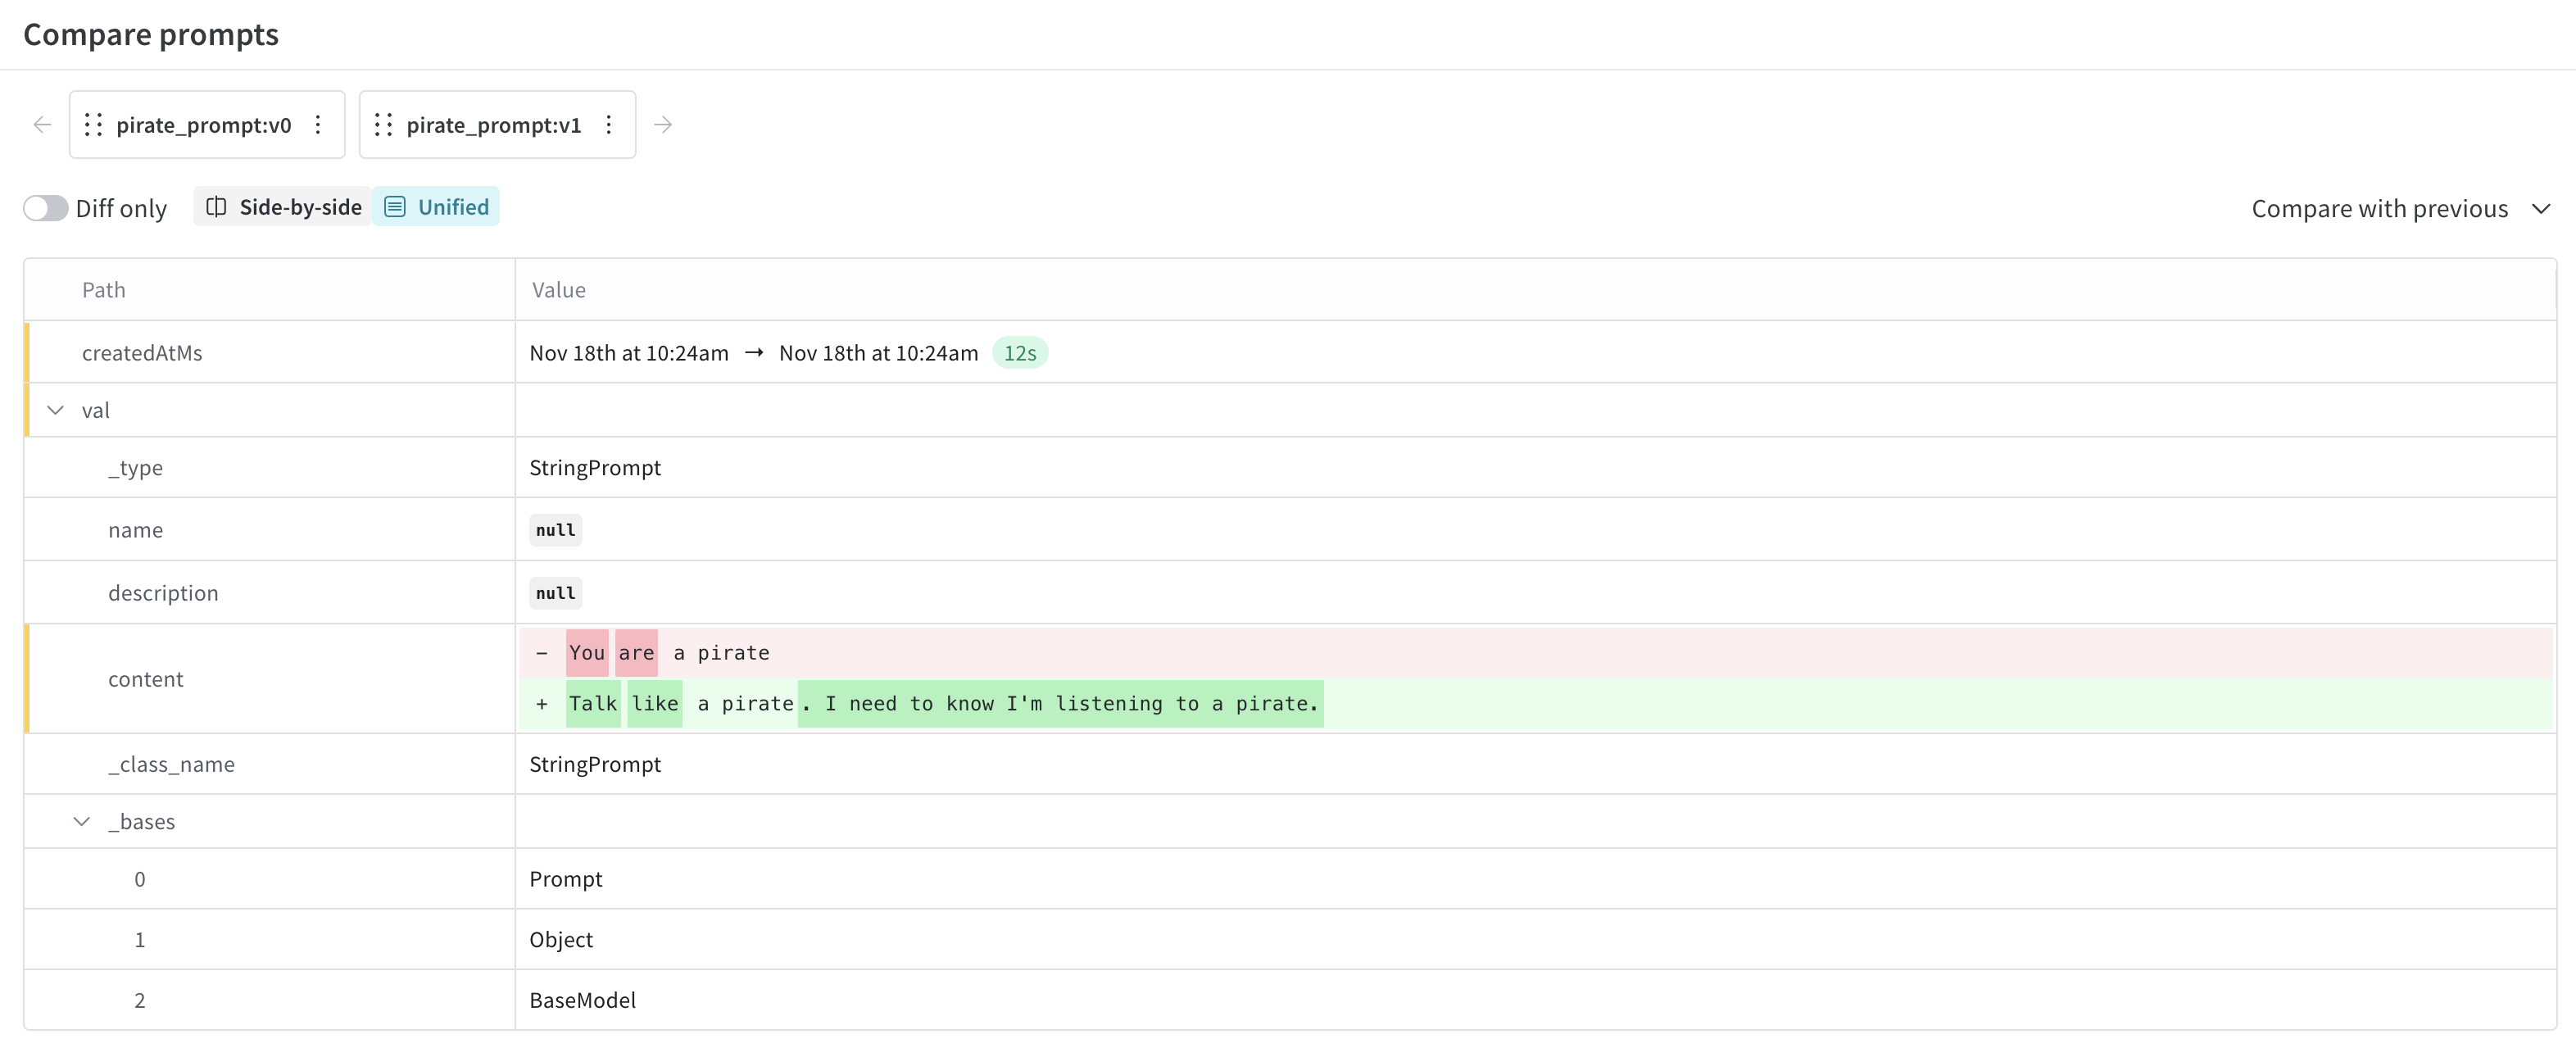
プロンプトバージョンの表示と比較
Weave はプロンプトのすべてのバージョンを自動的に追跡し、プロンプトがどのように進化したかの完全な履歴を作成します。このバージョン管理システムはプロンプトエンジニアリングのワークフローにおいて非常に重要であり、安全な実験、パフォーマンスの向上または悪化をもたらした変更の追跡、および必要に応じた以前のバージョンへの容易なロールバックを可能にします。同じ名前で異なるコンテンツのプロンプトを公開するたびに、Weave は以前のすべてのバージョンを保持しながら新しいバージョンを作成します。
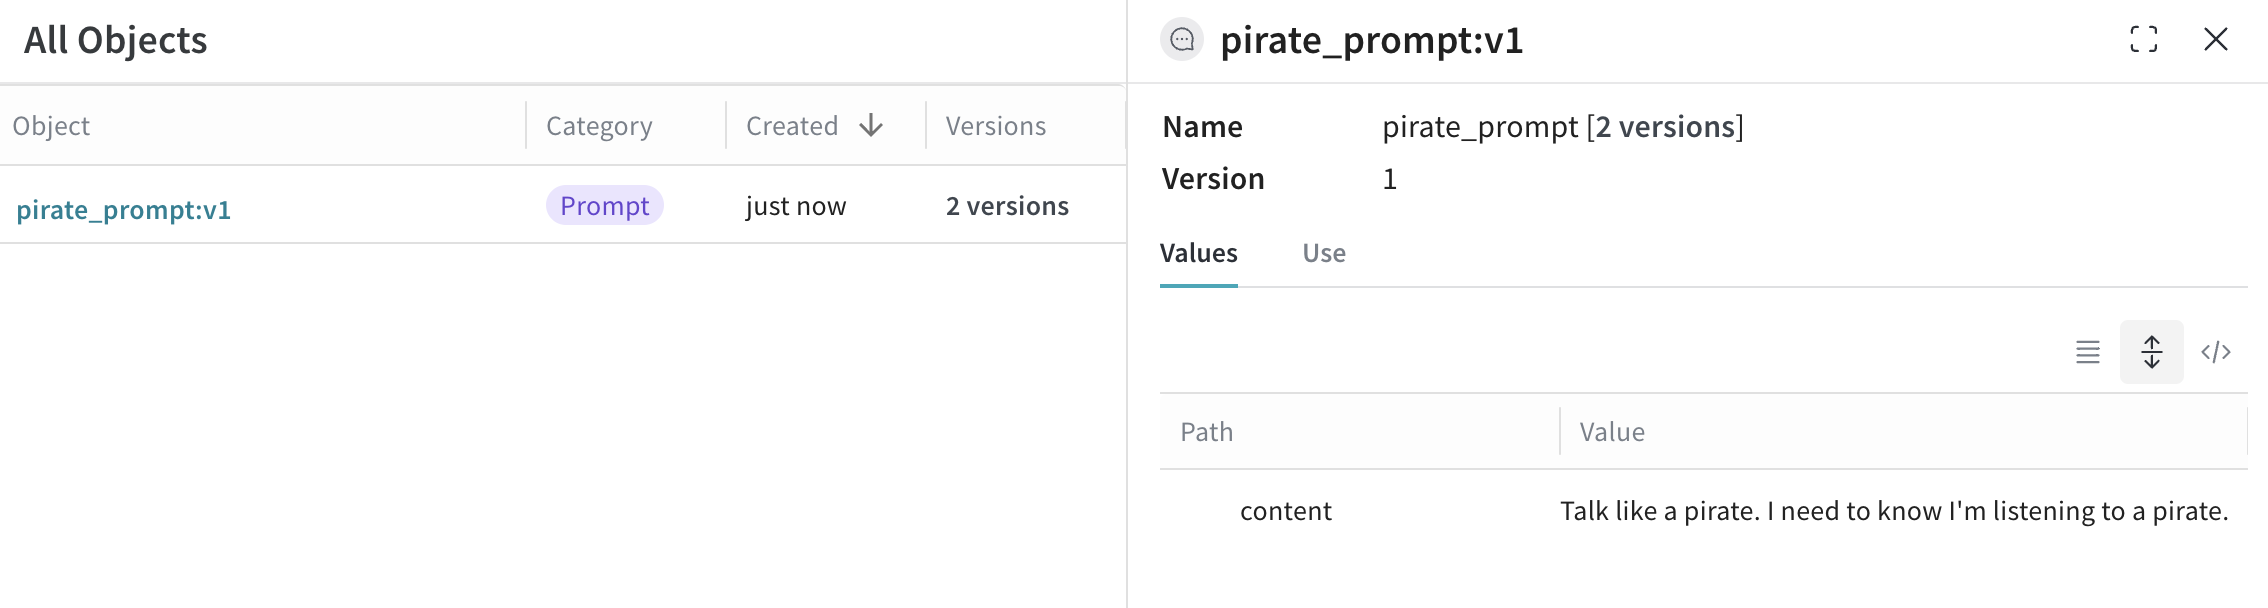
UI でプロンプトのバージョンを表示するには:
- UI でプロジェクトを開き、左メニューの Assets ボタンをクリックします。これで Assets ページが開きます。
- Assets ページから Prompts をクリックします。これで、プロジェクトのプロンプトがリストされている Prompts ページが開きます。
- Versions 列で、表示したいプロンプトの (x) Versions をクリックします。これでプロンプトバージョンのリストが開きます。
- (オプション)リストされたプロンプトの横にあるチェックボックスをクリックし、Compare ボタンをクリックすることで、プロンプトのバージョンを比較できます。これにより、プロンプト間の差分(diff)を確認できます。